This is the second part of the classy_blocks tutorial. If you’re new to this, you might want to start with part 1.
Points
Just to clear things up, classy_blocks uses the numpy package to do the heavy mathematical lifting. Anytime any classy object requires your input you can pass it a numpy array. In order to reduce clutter and amount of user input, classy will also gladly accept normal python lists. It will then convert those to numpy vectors automatically.
Therefore you could dopython_point = [0, 2, 1]
or
numpy_point = np.array([0, 2, 1]),
classy_blocks won’t mind. You can create a Face from a list of python_points or a list of numpy_points or evennp.array([[0, 0, 0], [1, 0, 0], [1, 1, 0], [0, 1, 0]]),
classy will as happy as ever.
Edges
In previous part of this tutorial we created a Face with 4 straight edges. But what if you wish to see some curves on your Block?
To specify curved edges, you can add a list of 4 values to your Face. The first value represents edge between face points 0 and 1, the second between 1 and 2, and so on. Use None for a straight edge or one of the following:
cb.Arc(point): a circular arc passing through the two face points and the one specified in the argument.cb.Origin(point, flatness): a circular arc passing through the two face points and with a specified origin. By default theflatnessparameter is 1. It will lower the radius if you specify less than 1 or increase it otherwise.
This is ESI-CFD’s alternative arc specification*.cb.Angle(angle, axis): a circular section with given angle (in radians). Theaxisvector (second argument) determines on which side of the two points the arc will be placed. Hint: use classy_blocks’ bonus functions for basic maths: from classy_blocks.util import functions as f.
This is the Foundation’s alternative arc specification*.cb.Spline(point_list): a spline passing through the specified list of points. It can have any (greater than one) number of points.cb.PolyLine(point_list): exactly the same as spline but with straight lines connecting the points.cb.Project(geometry): the edge will be projected to a given single surface or to an intersection between two surfaces. Those must be specified separately (a separate tutorial will be written about projecting stuff in blockMesh).
* Note that cb.Origin and cb.Angle are openfoam.org and openfoam.com alternatives to arc but both will work with classy_blocks. They will be inserted into blockMeshDict as plain arc edges. The original user’s notation will also be inserted and commented out to avoid compatibility problems.
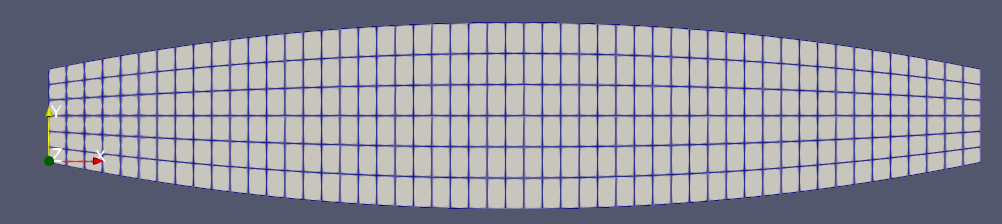
So now if you want to create a face that resembles a thick lens, it’s just too easy:
points = [
    [0, 0, 0],
    [1, 0, 0],
    [1, 0.1, 0],
    [0, 0.1, 0]
]

edges = [
    cb.Origin([0.5, 0.05, 0], flatness=5),
    None,
    cb.Origin([0.5, 0.05, 0], flatness=5),
    None,
]

face = cb.Face(points, edges)
Operations
Extrude and Box
You created a box using the Extrude operation in the previous part. However, there is a shortcut: box = cb.Box(corner_1, corner_2) in case your box is rectangular with all straight edges and aligned with cartesian coordinate system.
For more customized boxes, you’ll still have to Extrude them.
Loft
But what if you want even more customization of your blocks? For instance, you want to specify all edges but not in a nasty give-me-a-list-of-8-points manner? Then you use Loft.
Loft takes two independent Faces (which provide the 8 points) and connects them with four edges. To specify the latter, use Loft.add_side_edge(index, edge) on a created object. The index refers to Face point’s position (top and bottom), edge is the same you’d use for creating a Face.
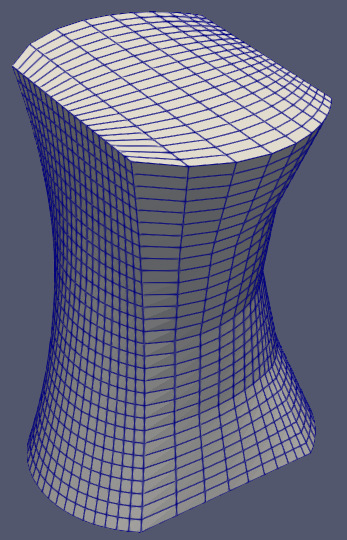
So now a more curvy block would look like
loft = cb.Loft(bottom_face, top_face)
loft.add_side_edge(0, cb.PolyLine([[0.15, 0.15, 0.5], [0.2, 0.2, 1.0], [0.15, 0.15, 1.5]]))
loft.add_side_edge(1, cb.Arc([0.9, 0.1, 1]))
loft.add_side_edge(2, cb.Arc([0.9, 0.9, 1]))
loft.add_side_edge(3, cb.Arc([0.1, 0.9, 1]))
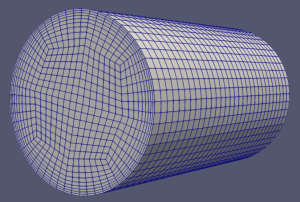
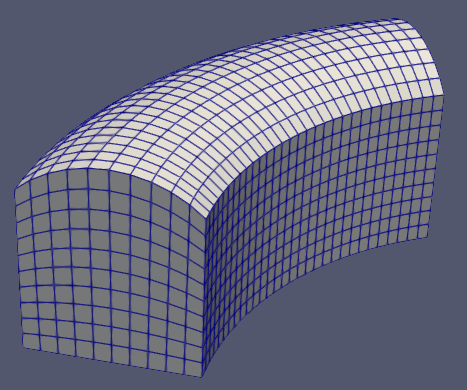
Revolve
The Loft is the most versatile but often a bit verbose. Any block shape can be created with it but It doesn’t save that much time or user input. That is especially the case when we need some kind of round geometry. And that could be quite often, speaking from my experience…
The Revolve(face, angle, axis, origin) object takes a Face and creates a block by revolving it around given axis. It will create arc side edges as if you used a revolve of some kind with a CAD software.
There’s more to classy_blocks!
Keep in touch for next tutorials with more goodies.