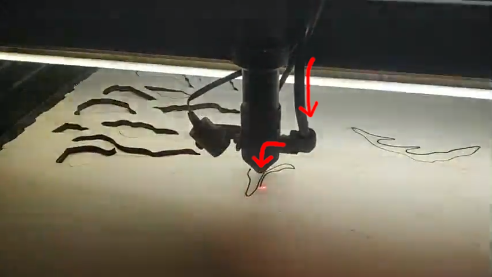
I solved the problem with burn marks on Klarart‘s laser cutter. Here is the blog post about details. At the end, I mentioned that the air assist nozzle might not be optimally shaped. Immediately I felt guilty for not backing that statement up. Here’s a quick-and-dirty CFD analysis of a wannabe ‘better’ air assist nozzle.
Original Geometry
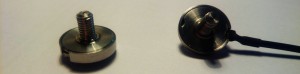
The cutting head is a tube that ends with a focusing lens. The latter also separates the top part of the tube from the bottom part, into which compressed air is forced from the side. The air assist nozzle is simply a thin conical ending of that tube:
My theory (which I possess the ownership of) was that due to sharp edges and sudden changes in geometry the default nozzle induces turbulence and noise. These in turn cause pressure loss, lower flow and decrease efficiency of smoke dispersal.
Modified Geometry
My theory (which is mine) was also that if I managed to create a smoother path for air the pressure drop would be lower. Therefore, air assist would be much improved.
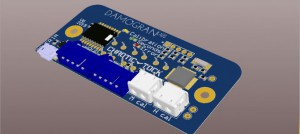
I devised a cunning plan where I would 3D print a plastic insert to fix the original nozzle. Like this:
I would simply insert the plastic part into the original nozzle. As simple as that.
Simulation
Time to put our theories (which belong to me) to the test. Since I don’t posess a supercomputer nor extensive knowledge of smoke simulations I had to make a few assumptions.
Assumptions, Simplifications
Physics
- I expect pressures and velocities to be relatively low so incompressible model should do.
- For the same reason as above, temperature effects can also be neglected.
- By my experience smoke cools down very quickly so it also doesn’t affect flow. What is more, its concentration is low enough so that it doesn’t have to be modeled separately (as another gas or particle cloud).
- Instead, smoke is modeled as a passive scalar that is being transported with the main flow.
- The source of smoke is the spot where cutting takes place.
- Smoke field,
s, is an arbitrary scalar field without physical representation. I can use it to compare simulations to each other to see what works better. - There are two sources: air assist in the nozzle and smoke extraction – a slow, steady flow through the machine’s working volume.
- Chosen OpenFOAM solver:
pimpleFoam.
Air Assist Nozzle Geometry
- I modeled the laser cutter head with an air-assist inlet as a short pipe.
- The working volume of the machine is simplified to a square box.
- Smoke extraction is from one side of the box to the other.
Results
As mentioned, an arbitrary value of scalar field s can be used to compare smoke concentration. The goal is to reduce smoke concentration near work surface. The lighter the color in the video, the less smoke is there.
Here’s a video of the whole thing:
Comments
It’s obvious on the first glance that the smoke never parts the working surface. Air assist drives it away from the very cutting point but most of the filth remains attached to the bottom.
Increasing the air velocity also can’t lift the smoke up. But since we know that does help with cleaner cuts, we can now guess the point is somewhere else. If you asked me, I’d say it’s the smoke concentration that causes visible burn marks. The concentration is high in the low velocity cases – where clouds appear small and dark. With increasing speed clouds’ sizes also increase.
When your air assist pump is weak the original geometry seems to do a better job. I guess that’s the turbulence – the fluctuations obviously help dispersing smoke particles. And kinetic energy.
However, with higher flows the turbulence obviously gets in the way. Clouds are much larger around the improved case where I guess we could use a smaller air assist pump with the same effect.
Conclusion
Keep in mind that this CFD simulation was carried out primarily for fun and only then for more serious purposes.
I mentioned that current setup on Klarart‘s machine works just fine. However, the results seem somewhat promising. In the future I’ll give my design a try and report if there’s a noticeable improvement.
Until then, just enjoy looking at these colorful figures for directors.